 block, drag it to the scripting area, and drop it anywhere in the scripting area.
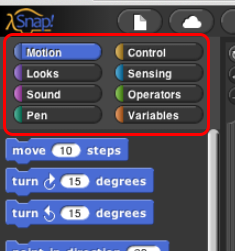
The area at the left edge of the window is the palette. As you see in the picture, it contains tabs for eight different-color block categories. In this lab, we will focus on the Motion, Sound, Pen, and Sensing tabs. You will learn about the other tabs in the next few labs.
These tabs are an important organizational structure in Snap! because they are home to the various blocks that you will use to tell the computer what to do. The blocks are categorized under each tab based on what kind of thing each block does.
Look at the Motion tab. Under this tab you will find a bunch of
blocks that correspond to motion-like actions. For example, click on the
block, drag it to the scripting area, and drop it anywhere in the scripting area.
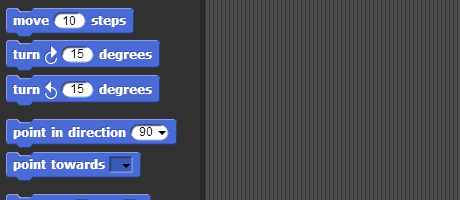
The block that you just dragged and dropped into the scripting area controls something that we call a sprite, which is the arrowhead-looking thing in the middle of the stage (the white part of the window).
Back to the scripting area, if you click on the
you just put there, the sprite will move 10 steps.
You can see this visually depicted by the sprite moving in the stage.
You can vary the input of the block, i.e., the number 10, to change
the number of steps you want to the sprite to move. See if you can
figure out how to change the block input so that the sprite moves backwards!